8 Chapter 8: Organizing and Outlining
Victoria Leonard, College of the Canyons
Adapted by William Kelvin, Professor of Communication Studies, Katharine O’Connor, Ph.D., and Jamie C. Votraw, Professor of Communication Studies, Florida SouthWestern State College
|
LEARNING OBJECTIVES |
|
After reading this chapter, you should be able to:
|

Figure 8.1: Outlining with Post it Notes1
Introduction
One of your authors remembers taking an urban studies course in college. The professor was incredibly knowledgeable and passionate about the subject. Do you think that alone made her want to go to class? Unfortunately not. As great as this professor was in so many ways, the lectures were not organized. As much as she tried to take great notes and follow along, it felt like a hopeless task. Having a great topic that you are passionate about is important, but organizing your speech so that the audience can follow along is vital to the success of your speech.
When students are faced with developing a speech, they face the same challenges as a student asked to write an essay. Although the end product may be different in that you are not writing an essay or turning one in, you will go through much of the same process as you would in writing an essay.
Before you get too far into the writing process, it is important to know what steps you will have to take to write your speech. Note that the speech-writing process is formulaic: it is based on time-honored principles of rhetoric established thousands of years ago. Your initial preparation work will include the following:
- Selecting a topic
- Writing a general purpose
- Writing a specific purpose
- Writing a thesis statement
- Selecting main points
- Writing a preview statement
- Writing the body of the speech
This chapter will explain each of these steps so that you can create a thorough and well-written speech. As with anything we do that requires effort, the more you put in, the more you will get out of the writing process, in terms of both your education and your grade.
The Speech Topic, General Purpose, Specific Purpose, and Thesis
Selecting a Topic
We all want to know that our topics will be interesting to our audience. If you think back to Chapter 5, Identifying Topic, Purpose, and Audience, you will recall how important it is to be audience-centered. Does this mean that you cannot talk about a topic that your audience is unfamiliar with? No, what it does mean is that your goal as a speaker is to make that topic relevant to the audience. Whether you are writing an informative speech on earthquakes or the singer Jhené Aiko, you will need to make sure that you approach the speech in a way that helps your speech resonate with the audience. Although many of you would not have been alive when Hurricane Andrew hit Florida in 1992, this is an important topic to people who live in hurricane zones. Explaining hurricanes and hurricane preparation would be a great way to bring this topic alive for people who may not have lived through this event. Similarly, many audience members may be unfamiliar with Jhené Aiko, and that allows you to share information about her that might lead someone to want to check out her music.
If you are writing a persuasive speech, you might approach your topic selection differently. Think about what is happening in the world today. You can look at what affects you and your peers at a local, state, national, or global level. Whether you believe that gun violence is important to address because it is a problem at the national level, or you wish to address parking fees on your campus, you will have given thought to what is important to your audience. As Chapter 2 explained, your topics must fulfill the ethical goals of the speech. If you are ethical and select a topic you care about and make it relevant for the audience, you are on the right track.
Here are some questions that might help you select a topic:
- What are some current trends in music or fashion?
- What hobbies do I have that might be interesting to others?
- What objects or habits do I use every day that are beneficial to know about?
- What people are influencing the world in social media or politics?
- What authors, artists, or actors have made an impact on society?
- What events have shaped our nation or our world?
- What political debates are taking place today?
- What challenges do we face as a society or species?
- What health-related conditions should others be aware of?
- What is important for all people to be aware of in your community?
Once you have answered these questions and narrowed your responses, you are still not done selecting your topic. For instance, you might have decided that you really care about dogs. This is a very broad topic and could easily lead to a dozen different speeches. Now you must further narrow down the topic in your purpose statements.
Writing the Purpose Statements
Purpose statements allow you to do two things. First, they allow you to focus on whether you are fulfilling the assignment. Second, they allow you to narrow your topic so that you are not speaking too broadly. When creating an outline for your speech, you should include the general purpose and specific purpose statement at the beginning of your outline.
A general purpose statement is the overarching goal of a speech whether to inform, to persuade, to inspire, to celebrate, to mourn, or to entertain. It describes what your speech goal is, or what you hope to achieve. In public speaking classes, you will be asked to do any of the following: To inform, to persuade, or to entertain. Thus, your general purpose statement will be two words—the easiest points you will ever earn! But these two words are critical for you to keep in mind as you write the speech. Your authors have seen many persuasive speeches submitted inappropriately as informative speeches. Likewise, one author remembers a fascinating “persuasive speech” on the death penalty that never took a stance on the issue or asked the audience to—that would be an informative speech, right? You must always know your broad goal. Your audience should know it, too, and so should your instructor! Knowing your purpose is important because this is what you begin with to build your speech. It is also important to know your general purpose because this will determine your research approach. You might use different sources if you were writing a speech to inform versus to persuade.
A specific purpose statement is consistent with the general purpose of the speech, written according to assignment requirements, and clearly identifies desired audience outcomes. It is a declaration starting with the general purpose and then providing the topic with the precise objectives of the speech. It will be written according to your general purpose. For instance, the home design enthusiast might write the following specific purpose statement: To inform my audience about the pros and cons of flipping houses.
Specific purpose statements are integral in knowing if your speech is narrowed enough or if you need to narrow it further. Consider these examples:
- To inform my audience about musical instruments
- To inform my audience about string instruments
- To inform my audience about the violin
As you can see, the first two examples are far too broad. But is the third purpose statement sufficiently narrow? Will the speaker be covering the violin’s design, physics, history, cost, or how to play it? What do you think about these possible topics?
- To inform my audience about the life and contributions of Patricia Bath
- To inform my audience about the invention of the wheelchair
- To inform my audience about the Biloxi Wade-Ins
- To inform my audience about how Fibromyalgia affects the body

Figure 8.2: Dr. Patricia Bath2
Hopefully, you can see that the examples above would work for an informative speech. They are specific and limited in their scope.
Your instructor will give you a time limit for your speech. Your specific purpose should help you see if you can stay within the time limit. You should put the purpose statements on your outline. Others may only ask you to put these on your topic submission. However, you do not state a general purpose or specific purpose during the delivery of your speech! These are simply guidelines for you as you write and for your instructor as they assess your writing.
Writing the Thesis Statement
A thesis statement is a single, declarative statement that encapsulates the essence of your speech. Just like in essay writing, you want your thesis statement, or central idea, to reveal what your speech is about. Thesis statements can never be written as questions, nor can they include a research citation. The thesis statement is not a list of main points, it is an over-arching idea that encapsulates them all.
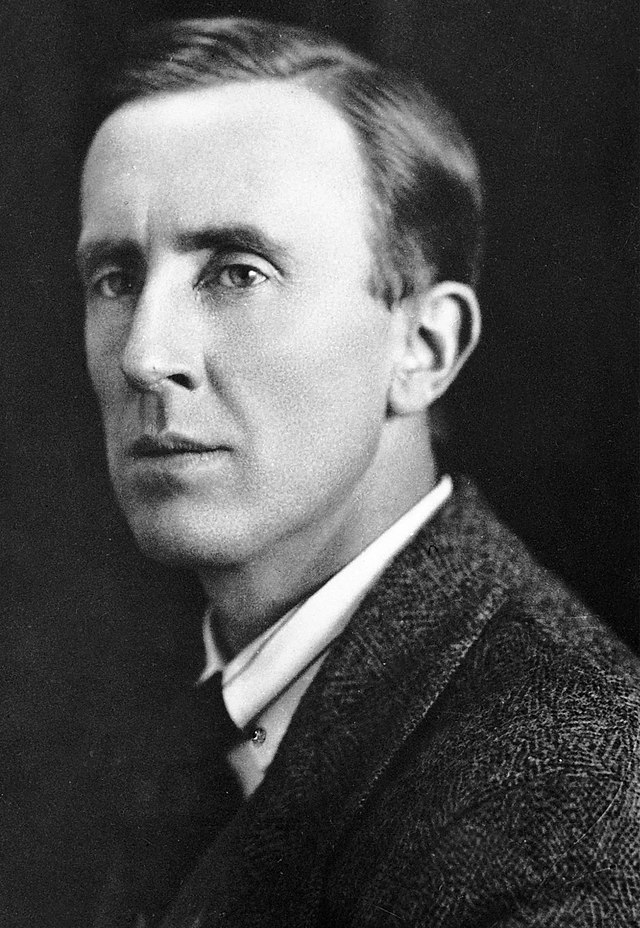
Figure 8.3: Portrait of Author, J.R.R. Tolkien3
As a Lord of the Rings enthusiast, I may choose to write a speech on author J.R.R. Tolkien. Here is an example of what a thesis statement may sound like:
J.R.R. Tolkien is known as the father of modern fantasy literature and became a pop culture icon after his death.
The thesis you just read provides the audience with just enough information to help them know what they will hear ahd learn from your speech.
Selecting Main Points
The main points are the major ideas you want to cover in your speech. Since speeches have time requirements, your outline will always be limited to two to three main points. Many instructors suggest that you have no more than three main points so you can do justice to each idea and stay within the time frame. You will also lose time on each main point describing it in the preview statement, internal transitions, and review of main points in the conclusion. Plus, it can be difficult for audiences to remember many points.
Let’s determine the main points for a short speech using the J.R.R. Tolkien thesis above. Having researched his life, you might come up with an initial list like this:
- Childhood and Background
- Military service
- Challenges
- Family
- Legacy
- Literary fame and honors
As interesting as all of these topics are, there is not enough time to speak about each idea. This is where the difficult decision of narrowing a speech comes in. Brainstorming all of the points you could cover would be your first step. Then, you need to determine which of the points would be the most interesting for your audience to hear. There are also creative ways to combine ideas and touch on key points within each main point. You will see how this can be achieved in the next section as we narrow down the number of topics we will discuss about J.R.R. Tolkein.
Writing the Preview Statement
A preview statement is a guide to your speech. This is the part of the speech that literally tells the audience exactly what main points you will cover. If you were to open an app on your phone to get directions to a location, you would be told exactly how to get there. Best of all, you would know what to look for, such as landmarks. A preview statement in a speech fulfills the same goal. It is a roadmap for your speech. Let’s look at how a thesis and preview statement might look for a speech on J.R.R. Tolkien:
Thesis: J.R.R. Tolkien is known as the father of modern fantasy literature and became a pop culture icon after his death.
Preview: First, I will tell you about J.R.R. Tolkien’s humble beginnings. Then, I will describe his rise to literary fame. Finally, I will explain his lasting cultural legacy.
Notice that the thesis statement captures the essence of the speech. The preview concisely names each main point that supports the thesis. You will want to refer to these main point names, or taglines, throughout the speech. This repetition will help audience members remember each main point; use variations of these taglines in your preview statement, when introducing each point, and again in the conclusion.
Always use your words to make the audience feel that they are part of the performance. This makes them feel included and on your side. Also, occasionally audience members will have more expertise than you. Imagine how an expert would feel when you begin your speech with “Today I will teach you about…” when they already know a lot about the subject. Use inclusive language in your preview statement–“Get ready to join me on a fantastic adventure…”
Organizing the Main Points
Once you know what your speech is about, you can begin developing the body of your speech. The body of the speech is the longest and most important part of your speech because it’s where the general purpose is executed, e.g., you inform or persuade with the main points that you listed in your preview statement. In general, the body of the speech comprises about 75% to 80% of the length of your speech. This is where you will present the bulk of your research, evidence, examples, and any other supporting material you have. Chapter 7 will provide you with specifics on how to do research and support your speech.
Several patterns of organization are available to choose from when writing a speech. You should keep in mind that some patterns work only for informative speeches and others for persuasive speeches. The topical, chronological, spatial, or causal patterns discussed here are best suited to informative speeches. The patterns of organization for persuasive speeches will be discussed in Chapter 10.
Topical Pattern
The chronological pattern needed main points ordered in a specific sequence, whereas the topical pattern arranges the information of the speech into different subtopics. For example, you are currently attending college. Within your college, various student services are important for you to use while you are there. You may visit the Richard H. Rush Library and its computer lab, Academic Support Centers, Career Services and the Office of Student Financial Aid.

Figure 8.6: Valencia Campus Library Stacks6
To organize this speech topically, it doesn’t matter which area you speak about first, but here is how you could organize it:
Topic: Student Services at Florida SouthWestern State College
Thesis Statement: Florida SouthWestern State College has five important student services, which include the library, the library computer lab, Academic Support Centers, Career Services and the Financial Aid office.
Preview: This speech will discuss each of the five important student services that Florida SouthWestern State College offers.
Main Points:
I. The Richard H. Rush Library can be accessed five days a week and online and has a multitude of books, periodicals, and other resources to use.
II.The library’s computer lab is open for students to use for several hours a day, with reliable, high-speed internet connections and webcams.
III.The Academic Support Centers have subject tutors, computers, and study rooms.
IV.CareerSource offers career services both in-person and online, with counseling and access to job listings and networking opportunities.
V. The Office of Student Financial Aid is one of the busiest offices on campus, offering students a multitude of methods by which they can supplement their personal finances by paying for both tuition and books.
Note that many novices appreciate the topical pattern because of its simplicity. However, because there is no internal logic to the ordering of points, the speech writer loses an opportunity to include a mnemonic device (phrasing that helps people remember information) in their performance. Audience members are more likely to remember information if it hangs together in an ordered, logical way, such as the following patterns employ.
Chronological (Temporal) Pattern
When organizing a speech based on time or sequence, you would use a chronological (temporal) pattern of organization. Speeches that look at the history of someone or something, or the evolution of an object or a process could be organized chronologically. For example, you could use this pattern in speaking about President Barack Obama, the Holocaust, the evolution of the cell phone, or how to carve a pumpkin. The challenge of using this pattern is to make sure your speech has distinct main points and that it does not appear to be storytelling.
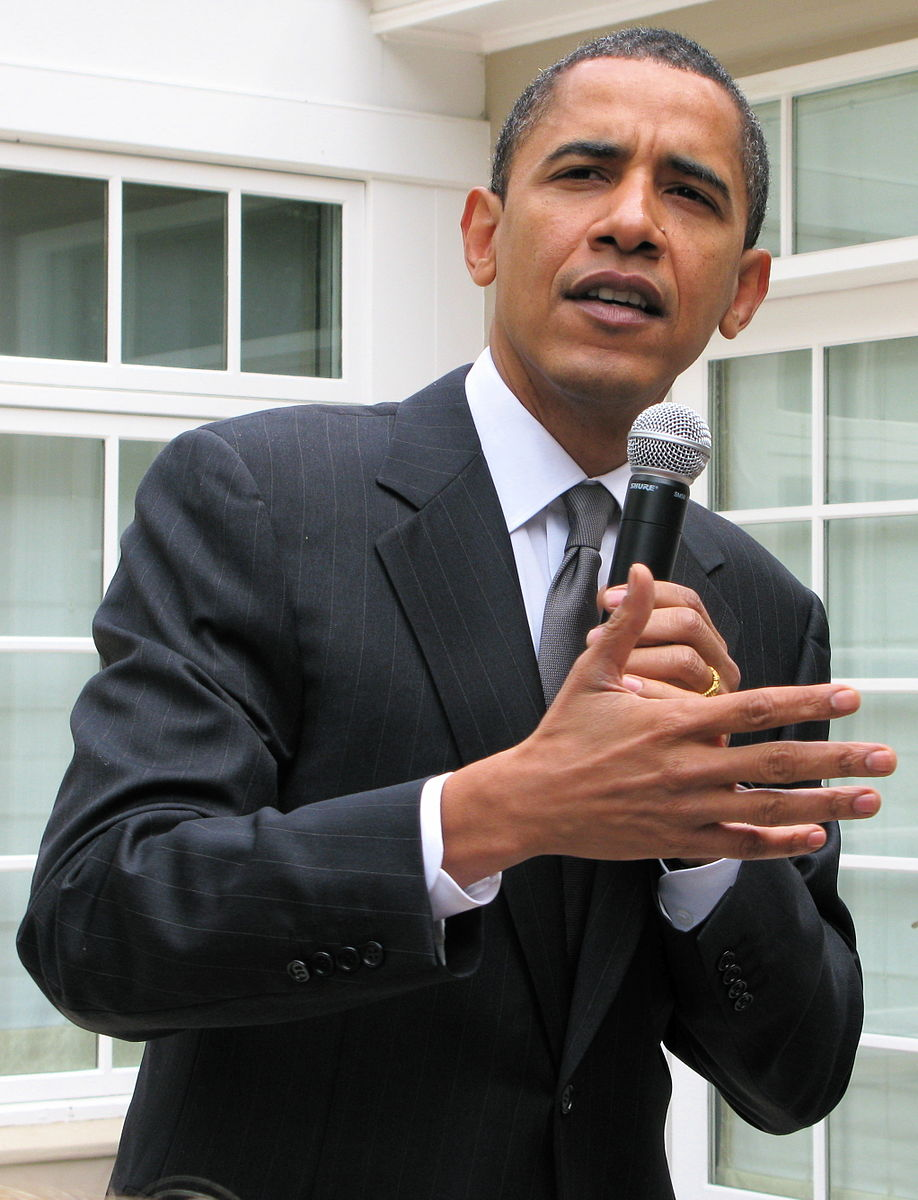
Figure 8.4: Barack Obama4
Here is an example of how your main points will help you make sure that the points are clear and distinct:
Topic: President Barack Obama
Specific Purpose: To inform my audience about the life of President Barack Obama.
Thesis: From his humble beginnings, President Barack Obama succeeded in law and politics to become the first African-American president in U.S. history.
Preview: First, let’s look at Obama’s background and career in law. Then, we will look at his rise to the presidency of the United States. Finally, we will explore his accomplishments after leaving the White House.
Main Points:
I. First, let’s look at the early life of Obama and his career as a lawyer and advocate.
II. Second, let’s examine how Obama transitioned from law to becoming the first African-American President of the United States.
III. Finally, let’s explore all that Obama has achieved since he left the White House.
We hope that you can see that the main points clearly define and isolate different parts of Obama’s life so that each point is distinct. Using a chronological pattern can also help you with other types of informative speech topics.
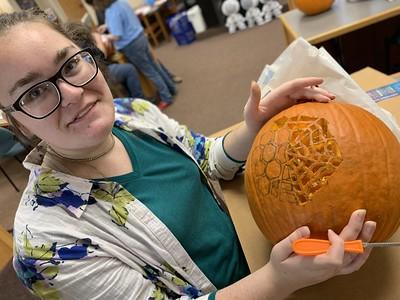
Figure 8.5: Pumpkin Carving5
Here is an additional example to help you see different ways to use this pattern:
Topic: How to Carve a Pumpkin
Specific Purpose: To inform my audience how to carve a pumpkin.
Thesis: Carving a pumpkin with special techniques and tools can result in amazing creations.
Preview: First, I will explain the process of gutting the pumpkin in preparation for carving. Then, I will describe the way you use your special tools to carve the face you hope to create. Finally, I will show you a variety of different designs that are unique to make your pumpkin memorable.
Main Points:
I. First, let me explain exactly how you open up the pumpkin, remove the seeds, and clean it so it is ready to carve.
II. Second, let me describe how the tools you have on hand are used to draw and carve the face of the pumpkin.
III. Finally, let me show you several unique designs that will make your pumpkin dazzle your friends and neighbors.
Note that some instructors prefer their students not give “how-to” speeches. Always clear your topic with your instructor early on in the speech-writing process.
Spatial Pattern
A spatial pattern arranges ideas according to their physical or geographic relationships. Typically, we can begin with a starting point and look at the main points of your speech directionally from top to bottom, inside to outside, left to right, north to south, and so on. A spatial pattern allows for creativity as well as clarity. For example, a speech about an automobile could be arranged using a spatial pattern and you might describe the car from the front end to the back end or the interior to the exterior. A speech on Disneyland might begin with your starting point at the entrance on Main Street, and each subsequent main point may be organized by going through each land in the park in a directional manner. Even a speech on the horrific tsunami off the Indonesian coast of Sumatra on December 26, 2004, could be discussed spatially as you use the starting point and describe the destruction as it traveled, killing 250,000 people.
If you have never heard of the Great Pacific Garbage Patch, it is marine debris that is in the North Pacific Ocean. Just like the tsunami in the previous example, this mass could likewise be discussed using a spatial pattern.
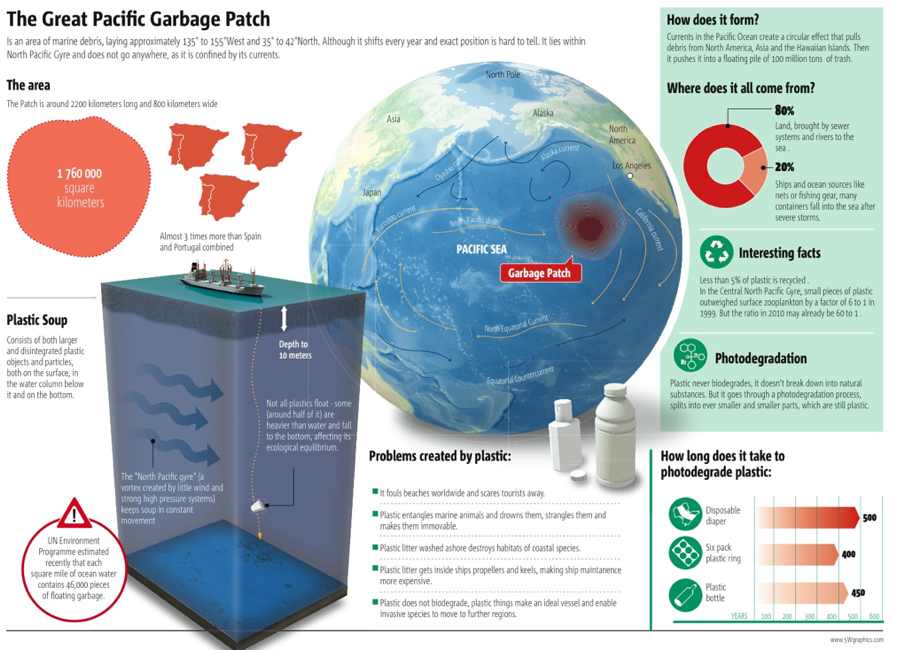
Figure 8.7: The Great Pacific Garbage Patch7
In an informative speech, you could arrange your points spatially like this:
Topic: Great Pacific Garbage Patch
Thesis: The Great Pacific Garbage patch is not well known to most people; it consists of marine debris that is located in the North Pacific Ocean.
Preview: First, I will describe the Eastern Garbage Patch. Finally, I will explain the Western Patch.
I. The Eastern Garbage patch is located between the states of Hawaii and California.
II. The Western Garbage Patch is located near Japan.
Causal Pattern
A causal pattern of organization can be used to describe what occurred that caused something to happen, and what the effects were. Conversely, another approach is to begin with the effects and then talk about what caused them. For example, in 1994, there was a 6.7 magnitude earthquake that occurred in the San Fernando Valley in Northridge, California.
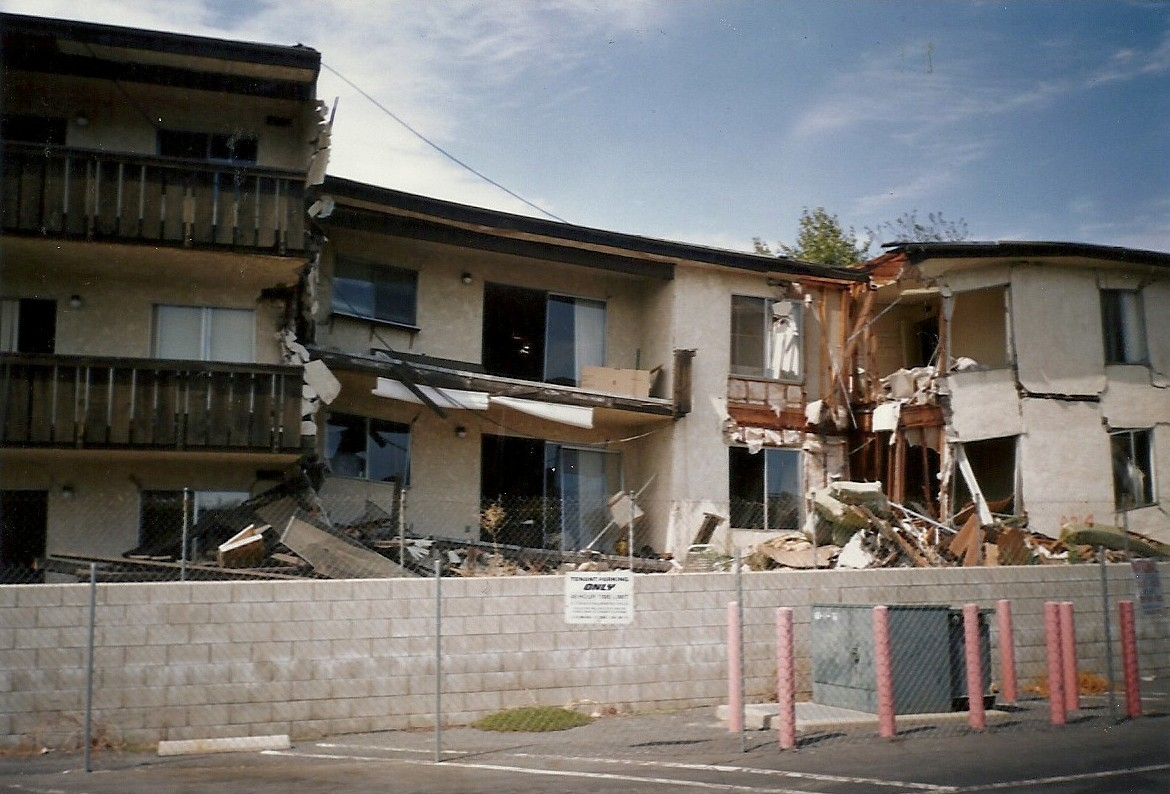
Figure 8.8: Northridge Meadows Apartment Building Collapse8
Let’s look at how we can arrange this speech first by using a cause-effect pattern:
Topic: Northridge Earthquake
Thesis: The Northridge, California earthquake was a devastating event that was caused by an unknown fault and resulted in the loss of life and billions of dollars of damage.
I. The Northridge earthquake was caused by a fault that was previously unknown and located nine miles beneath Northridge.
II. The Northridge earthquake resulted in the loss of 57 lives and over 40 billion dollars of damage in Northridge and surrounding communities.
Depending on your topic, you may decide it is more impactful to start with the effects and work back to the causes (effect-cause pattern). Let’s take the same example and flip it around:
Thesis: The Northridge, California earthquake was a devastating event that resulted in the loss of life and billions of dollars in damage and was caused by an unknown fault below Northridge.
I. The Northridge earthquake resulted in the loss of 57 lives and over 40 billion dollars of damage in Northridge and surrounding communities.
II. The Northridge earthquake was caused by a fault that was previously unknown and located nine miles beneath Northridge.
Why might you decide to use an effect-cause approach rather than a cause-effect approach? In this particular example, the effects of the earthquake were truly horrible. If you heard all of that information first, you would be much more curious to hear about what caused such devastation. Sometimes natural disasters are not that exciting, even when they are horrible. Why? Unless they affect us directly, we may not have the same attachment to the topic. This is one example where an effect-cause approach may be very impactful.
One take-home idea for you about organizing patterns is that you can usually use any pattern with any topic. Could the Great Pacific Garbage Patch be explained using the chronological or causal patterns? Could the Northridge quake be discussed using the chronological or spatial patterns? Could a pumpkin-carving speech be spatially organized? The answer to all of the above is yes. The organizational pattern you select should be one that you think will best help the audience make sense of, and remember, your ideas.
Developing the Outline
Although students are often intimidated by the process of outlining a speech, you should know that it is a formulaic process. Once you understand the formula–the same one speech instructors have long taught and used to assess throughout the nation–speech writing should be a cinch. And remember, this process is what organizes your speech. A well-organized speech leads to better delivery. Simply, outlining is a method of organizing the introduction, body with main points, and conclusion of your speech. Outlines are NOT essays; they are properly formatted outlines! They use specific symbols in a specific order to help you break down your ideas in a clear way. There are two types of outlines: the preparation outline and the speaking outline.
Outline Types
When you begin the outlining process, you will create a preparation outline. A preparation outline consists of full, complete sentences, and thus, is void of awkward sentences and sentence fragments. In a full-sentence preparation outline, only one punctuated sentence should appear beside each symbol. In many cases, this type of outline will be used in preparing your speech, but will not be allowed to be used during your speech delivery. Remember that even though this outline requires complete sentences, it is still not an essay. The examples you saw earlier in this chapter were written in complete sentences, which is exactly what a preparation outline should look like.
A speaking outline is less detailed than the preparation outline and will include brief phrases or words that help you remember your key ideas. It is also called a “key word” outline because it is not written in complete sentences–only key words are present to jog your memory as needed. It should include elements of the introduction, body, and conclusion, as well as your transitions. Speaking outlines may be written on index cards to be used when you deliver your speech.
Confirm with your professor about specific submission requirements for preparation and speaking outlines.
Outline Components
Introduction and Conclusion
In Chapter 9, we identified the components of effective introductions and conclusions. Do you remember what they were? Your preparation outline should delineate the five elements of an introduction and the four elements of a conclusion. Recall, a complete introduction includes an attention-getter, relates the topic to the audience, establishes speaker credibility, states the thesis, and previews the main points. A quality conclusion will signal the speech is ending, restate the thesis, review the main points, and finish with a memorable ending.
Main Points
Main points are the main ideas in the speech. In other words, the main points are what your audience should remember from your talk, and they are phrased as single, declarative sentences. These are never phrased as a question, nor can they be a quote or form of citation. Any supporting material you have will be put in your outline as a subpoint. Since this is a public speaking class, your instructor will decide how long your speeches will be, but in general, you can assume that no speech will be longer than 10 minutes in length. Given that alone, we can make one assumption: All speeches will fall between 2 to 3 main points based simply on length. If you are working on an outline and you have ten main points, something is wrong, and you need to revisit your ideas to see how you need to reorganize your points.
All main points are preceded by Roman numerals (I, II, III, IV, V). Subpoints are preceded by capital letters (A, B, C, etc.), sub-sub points by Arabic numerals (1, 2, 3, etc.), then sub-sub-sub points by lowercase letters (a, b, c, etc.). You may expand further than this. Here is a short template:
I. First main point
-
-
- First main point
- First subpoint
- Second subpoint
- Third subpoint
- First sub-subpoint
- Second sub-subpoint
- First sub-sub-subpoint
- Second sub-sub-subpoint
- Second main point
- Third main point
- First main point
-
References List
A quality speech requires a speaker to cite evidence to support their claims. Your professor will likely require that you incorporate evidence from your research in both your outline and speech. In Chapter 7, we reviewed how to gather information, incorporate the research into your speech, and cite your sources, both in your written outline and during oral delivery. An ethical and credible speaker gives credit where credit is due and shares source information with the audience. Accordingly, the last piece of your preparation outline is the References List. The references list will include full written citations for all resources used in the composition and presentation of your speech. The structure of the references list follows a specific format dictated by the American Psychological Association 7th Ed. (remember, the Communication Studies discipline uses this APA formatting). Since formatting varies by source type, it is useful to refer to a reference guide to determine the exact citation formatting when writing your references list.
Written Oral Citations
There is a good chance your professor will ask you to include oral citations in your speech delivery. If so, you should include these in your preparation outline. The written oral citation is where you share your evidence and details of how you plan to cite the source during the delivery. Often, this is written in a similar format as “According to an article titled [title], written by [author] in [year], [resource content].” You should include enough source-identifying information for your audience to verify the accuracy and credibility of the content. In your outline, write out the specific source-information you will use to orally cite the source in your speech. Discuss the required number of oral citations with your professor and include all of them in your written outline. At FSW, we require three oral citations.
Outlining Principles
Next, we will cover the principles of outline which are outlining “rules” that you want to follow to be most effective. (Your English teachers will thank us, too!). First, read through this example outline for a main point about dogs. We will recall this example as we move through the principles. Don’t skip this example. Read it now!

Figure 6.9: Big and Small Dog9
Topic: Dogs
Thesis: There are many types of dogs that individuals can select from before deciding which would make the best family pet.
Preview: First, I will describe the characteristics of large breed dogs, then I will discuss the characteristics of small breed dogs.
-
-
- First, let’s look at the characteristics of large breed dogs.
- Some large breed dogs need daily activity.
- Some large breed dogs are dog friendly.
- Some large breed dogs drool.
- If you are particularly neat, you may not want one of these.
- Bloodhounds drool the most.
- After eating is one of the times drooling is bad.
- The drooling is horrible after they drink, so beware!
- Great Pyrenees Mountain dogs drool as well.
- Bloodhounds drool the most.
- If you live in an apartment, these breeds could pose a problem.
- If you are particularly neat, you may not want one of these.
- First, let’s look at the characteristics of large breed dogs.
-
Transition statement: Now that we’ve explored the characteristics of large breed dogs, let’s contrast this with small breeds.
-
-
- Let’s look at the characteristics of small breed dogs.
- Some small breed dogs need daily activity.
- Some small breed dogs are dog friendly.
- Some small breed dogs are friendly to strangers.
- Welsh Terriers love strangers.
- They will jump on people.
- They will wag their tails and nuzzle.
- Beagles love strangers.
- Cockapoos also love strangers.
- Welsh Terriers love strangers.
- Let’s look at the characteristics of small breed dogs.
-
This dog example will help us showcase the following outlining principles.
Subordination and Coordination
The example above helps us to explain the concepts of subordination and coordination. Subordination is used in outline organization so the content is in a hierarchical order. This means that your outline shows subordination by indention. All of the points that are “beneath” (indented in the format) are called subordinate points. For example, if you have a job with a supervisor, you are subordinate to the supervisor. The supervisor is subordinate to the owner of the company. Your outline content works in a similar way. Using the dog example outlined in the previous section of this chapter, subpoints A, B, and C described characteristics of large breed dogs, and those points are all subordinate to main point I. Similarly, subpoints i and ii beneath subpoint C.1. both described dogs that drool, so those are subordinate to subpoint C. If we had discussed “food” under point C, you would know that something didn’t make sense! Overall, to check your outline for coherence, think of the outline as a staircase; walking down the outline one step at a time.
Tech tip: You can use the Ruler function of word processing software such as Microsoft Word or Google Docs to create tabs that align subordinated points with each other and keep the following lines of text properly aligned. If you only use the tab key, text that flows beyond the first line will usually not align with the proper tab stop for a given sub-point. Some instructors may provide you with a template, but experiment with the Ruler function on your own. It’s very useful!
You will also see that there is a coordination of points. Coordination is used in outline organization so that all of the numbers or letters represent the same idea. You know they coordinate because they align vertically and there is no diagonal relationship between the symbols. In the dog example, A, B, and C were all characteristics of large breed dogs, so those are all coordinated and represent the same “idea.” Had C been “German Shepherd,” then the outline would have been incorrect because that is a type of dog, not a characteristic, therefore, breaking the rules of subordination and coordination.
Figure 8.10 below provides you with a visual graphic of the subordination and coordination process. You will see that the topic of this very brief outline is bread. The main point tells you that there are different types of bread: sourdough, wheat, white, and egg.
To check this brief outline for subordination, you would look to see what subpoints fall beneath the main point. Do all of the sub-points represent a type of bread? You will see that they do! Next, to check for coordination, you would look at all of the subpoints that have a vertical relationship to each other. Are the subpoints these four types of bread? They are. The image also allows you to see what happens when you make a mistake. The third example shows the subpoints as sourdough, wheat, white, and jelly. Clearly, jelly is not a type of bread. Thus, there is a lack of both subordination and coordination in this short example. Make sure you spend some time checking the subordination and coordination of your own subpoints all the way throughout the outline until you have reached your last level of subordination. Now, study the image so that these principles of outlining are crystal clear; please ask your professor questions about this because it is a major part of speechmaking.
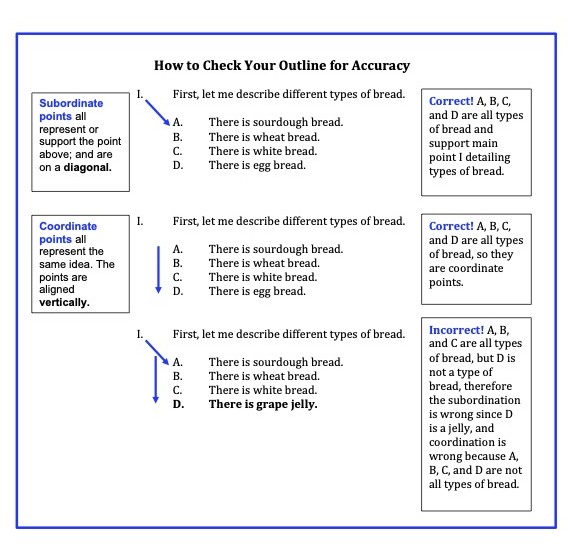
Figure 8.10: Checking Your Outline10
You may be wondering why we bother with subordination and coordination. It actually helps both your listeners and your instructors. Listening is difficult. Any techniques that help audiences make sense of information are welcome. As soon as you begin talking, audiences listen for cues on how you are structuring information. If you organize clearly using logical relationships, your audience will be better able to follow your ideas. Further, for busy instructors examining many students’ outlines, when students’ grasp of subordination and coordination jump off the page due to their proper visual alignment, we know that students understand how to organize information for verbal delivery.
Parallelism
Another important rule in outlining is known as parallelism. This means that, when possible, you begin your sentences in a similar way, using a similar grammatical structure. For example, in the previous example on dogs, some of the sentences began with “some large breed dogs.” This type of structure adds clarity to your speech. Students often worry that parallelism will sound boring. It’s actually the opposite! It adds clarity. However, if you had ten sentences in a row, we would never recommend you begin them all the same way. That is where transitions come into the picture and break up any monotony that could occur.
Division
The principle of division is an important part of outlining. Division is a principle of outlining that requires a balance between two subpoints in an outline. For each idea in your speech, you should have enough subordinate ideas to explain the point in detail and you must have enough meaningful information so that you can divide it into a minimum of two subpoints (A and B). If subpoint A has enough information that you can explain it, then it, too, should be able to be divided into two subpoints (1 and 2). So, in other words, division means this: If you have an A, then you need a B; if you have a 1, then you need a 2, and so on. What if you cannot divide the point? In a case like that, you would simply incorporate the information in the point above.
Connecting Your 2-3 Main Points
There are different types of transitions, which are words or phrases that help you connect all sections of your speech. To guarantee the flow of the speech, you will write transition statements to make connections between all sections of the outline. You will use these transitions throughout the outline, including between the introduction and the body, between the 2-3 main points, and between the body and the conclusion.
- Internal Reviews (Summaries) and Previews are short descriptions of what a speaker has said and will say that are delivered between main points.
Internal Reviews give your audience a cue that you have finished a main point and are moving on to the next main point. These also help remind the audience of what you have spoken about throughout your speech. For example, an internal review may sound like this, “So far, we have seen that the pencil has a long and interesting history. We also looked at the many uses the pencil has that you may not have known about previously.”
Internal Previews lay out what will occur next in your speech. They are longer than transitional words or signposts. For example, “Next, let us explore what types of pencils there are to pick from that will be best for your specific project.”
- Signposts are transitional words that are not full sentences, but connect ideas using words like “first,” “next,” “also,” “moreover,” etc. Signposts are used within the main point you are discussing, and they help the audience know when you are moving to a new idea.
- A nonverbal transition is a transition that does not use words. Rather, movement, such as pausing as you move from one point to another is one way to use a nonverbal transition. You can also use inflection by raising the pitch of your voice on a signpost to indicate that you are transitioning.
The most effective transitions typically combine many or all of the elements discussed here. Here is an example:
Now (signpost) that I have told you about the history of the pencil, as well as its many uses, (internal review) let’s look at what types of pencils you can pick from (mime picking up a pencil and moving a few steps for nonverbal transition) that might be best for your project (internal preview).
Conclusion
Although this wasn’t the splashiest chapter in the text, it is one of the most critical chapters in speechmaking. Communicating your ideas in an organized and developed fashion means your audience will easily understand you. Each one of the principles and examples provided should be referenced as you work to develop your own speech. Remember that your speech will have a general purpose (typically to inform or persuade) and a specific purpose that details exactly what you hope to accomplish in the speech. Your speech’s thesis statement will be the central idea, what audiences most remember. The thesis is not just a list of main points, but it is a larger idea encompassing the two to three main points supporting it in the speech. Speeches should follow an organizational pattern, use standard formatting practices, and progress from full-sentence preparation outlines to key word speaking outlines before your performance. To see how all of these pieces come together, check out the sample preparation outline included at the bottom of the chapter. When writing your own preparation outline, use this sample as a guide. Consider each component a puzzle piece needed to make your outline complete.
Reflection Questions
- How has the information regarding general and specific purpose statements helped you to narrow your topic for your speech?
- Using brainstorming, can you generate a list of possible main points for your speech topic? Then, how will you decide which are the best choices to speak on?
- Which pattern(s) of organization do you think would be best for your informative speech? Why?
- Researchers say writing in small bursts is better. Do you agree that it is more effective to write your outline in small chunks of time rather than writing an entire speech in one day? Why or why not?
Key Terms
Body of the Speech
Causal Pattern
Chronological (Temporal) Pattern
Conclusion
Coordination
Division
General Purpose Statement
Internal Review (Summary)
Internal Preview
Introduction
Main Points
Nonverbal Transition
Outline
Parallelism
Preparation Outline
Preview Statement
References List
Signpost
Spatial Pattern
Speaking Outline
Specific Purpose Statement
Subordination
Thesis Statement
Topical Pattern
Transitions
Written Oral Citation
Sample Speaking Outline
General Purpose: To inform
Specific Purpose: By the end of this speech, my audience will be able to explain bottle bricking, bottle brick benches, and their purposes.
Introduction —
I. Attention Getter: How many of you have thrown away a piece of plastic in the last 24 hours? Perhaps you pulled cellophane off a pack of gum or emptied out a produce bag. You probably don’t think about it, but those little pieces of plastic have two potential destinations – if they’re obedient, they go to a landfill. If they’re rogue, they can end up in waterways.
II. Thesis Statement: Today we will learn about a revolutionary way of dealing with plastic trash called bottle bricking.
III. Relevance Statement: As our planet’s ecological crises worsen, each of us should reflect on our impact on the environment. According to the Sea Education Society, a non-profit dedicated to reducing pollution through environmental education, there are more than one million pieces of plastic per square mile in the most polluted parts of the Atlantic Ocean, as Kirsten Silven of Earthtimes.org reported in (2011). If you want to take steps to preserve our world’s natural beauty for future generations, this speech is for you.
IV. Credibility Statement: When I first learned about bottle bricks I was incredulous. I thought “what is the point of stuffing plastic into plastic bottles?”. But soon the idea took hold of me and I was volunteering with local groups, eventually inspiring the creation of a Bottle Brick Bench at a high school I worked at.
V. Preview Main Points Statement: In this speech, we will learn how a bottle brick is made, how they are turned into benches, and the purpose behind this seemingly strange activity.
Transition: Before we go any further, let’s learn how to make a bottle brick.
Body —
- How to make a bottle brick.
- Collect soft, clean plastic trash.
- You will soon notice it everywhere.
- The trash must be clean and dry.
- Collect and rinse out Gatorade bottles.
- Other hard-plastic bottles work, also.
- The bottles must be clean and dry.
- Get a sturdy stuffing stick.
- The stick should be long enough to reach the bottom of the bottle.
- Pick a smooth stick or give it a handle.
- Collect soft, clean plastic trash.
Transition: Now we know how to transform our trash into tools. But, what can bottle bricks be used for? One answer: a bench.
- Bottle Brick Benches
- The benches start with a stone foundation.
- Most creators argue you should use reclaimed stone (urbanite).
- Fill the bamboo frame with complete bottle bricks.
- Bricks make up the backrest.
- Cover with the bricks with cob, weatherize or place under a tree or roof.
- Cob is like mud.
- The benches start with a stone foundation.
Transition: Now we know how to transform our trash into tools. But, what can bottle bricks be used for? One answer: a bench.
- The purpose of Bottle Brick Benches.
- They raise awareness about plastic pollution.
- The benches make us realize how much plastic we toss, writes Brennan Blazer Bird on earthbench.org (2014), home of the Peace on Earthbench Movement that the 25-year-old ecological educator founded.
- Later, people might think about it the plastic away they throw away
- They repurpose a seemingly useless product.
- Currently we have little use for soft plastic; most film plastics are not recyclable.
- Benches are a sign for change, and they are comfortable.
- They keep plastic out of landfills and oceans.
- Plastic “sequestered” in a bottle avoids landfills and the ocean.
- Plastic pollution is a problem.
- In landfills it gets into drinking water.
- All five subtropical ocean gyres have plastic “garbage patches,” according to 5gyres, a nonprofit dedicated to eliminating plastic pollution in the gyres (5gyres.org, 2014).
- To have fun! The Harvest Collective called natural building such as earthbenches “incredibly fun and inspiring” on its website theharvestcollective.org (2014).
- They raise awareness about plastic pollution.
Transition: So now that we understand why someone would make a bottle brick bench, let’s see if we’ve successfully “stuffed” this knowledge into our heads. [I can make a bottle-stuffing motion to have fun during transition.]
Conclusion —
- Signal end of the speech: I think it’s safe to say that every one of us throws away plastic on a regular basis has some degree of concern for the health of our planet.
- Review Main Points: Today we’ve learned how to make bottle bricks, how to put them into a bottle brick bench, and the reasons for doing so.
- Restate Thesis: Today we have seen that we can turn our seemingly useless, polluting trash into safe, useful technology. Maybe we can use such forward-thinking attitudes to promote sustainable cycles in all aspects of society.
- Specify desired audience response: I know that you aren’t all going to rush home and start bricking, but I’d like you to remember the basic premises underlying bottle bricks. But, by all means, if you’re interested in adding to the Peace on Earth Bench for Movement, visit earthbench.org or talk to me in class sometime.
- Strong closing (clincher): Who knows, maybe when you’re about to graduate you will be able to sit on a Bottle Brick Bench on campus reminding us all that we, through our individual choices, have the power to transform our species’ problems into solutions.
